
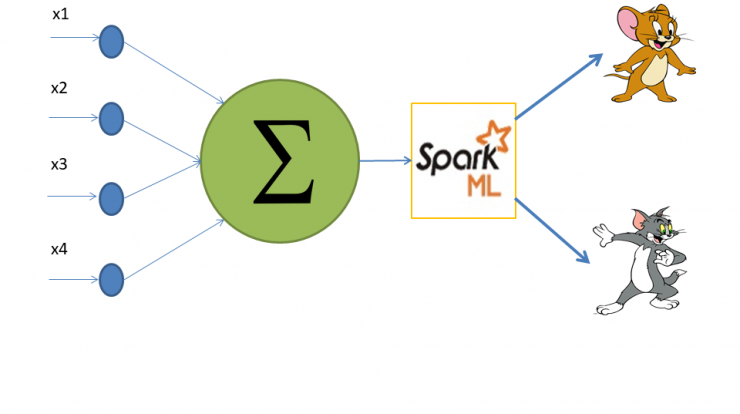
Quoting from wiki, classification is the problem of identifying to which of a set of categories (sub-populations) a new observation belongs, on the basis of a training set of data containing observations (or instances) whose category membership is known. There are many frameworks and libraries available to perform a classification. In this blog post, we are going to use Spark ML library and techniques to predict a categorical response. The classifier we use here is the Logistic Regression.
Problem and Data
The sinking of Titanic is one of the most infamous in ship wrecks. We are going to predict whether a passenger in Titanic will survive or not. Its one of kaggle challenges. The data dictionary for this machine learning exercise is available here. The data is divided into training and test data. We will use the training data to train out machine learning model and test data to check how well our model performs with unseen data.
Data Analysis and Cleansing
Lets take a look at the data. We first load the csv data into spark data frame.
Handling missing value in a dataset is an important step in data pre-processing. So, lets look at the age column values in the training data we just loaded. A quick check tells that 177 values out of 714 values are null. Therefore, we will fill the missing age values with mean age value. You can find out the mean with the help of describe call on the age dataframe as in the below snippet. To read more about missing column handling refer to fillna
We are now going to drop any feature columns that will have no impact on the model development. Like the column cabin has 77% null values in the training data. So we will drop this column from our training dataframe. More details about drop column here
Using the below snippet we will check if there any other null values in any of the other columns.
We will also drop some other columns like Name, PassengerId and Ticket as it will not help us build a generalised machine learning model.
Feature Engineering
Sometimes it is useful to define new features based on the available features in the datasets. Therefore, in this step we will create some new features from the existing data and features. Lets create a indicator that tells whether or not the passenger was travelling alone or with family. So we will combine the fields SibSp and Parch to create a new field stating whether or not the individual was alone or not as below:
ML Pipeline
In Machine Learning it is common to define a sequence of algorithms or transformations to the selected feature set. For instance, you would want to tokenize your text, convert into vector or index the categorical label etc.
Spark ML represents this steps as Pipeline. ML Pipeline is a sequence of stages which consist of either Transformations or Estimators
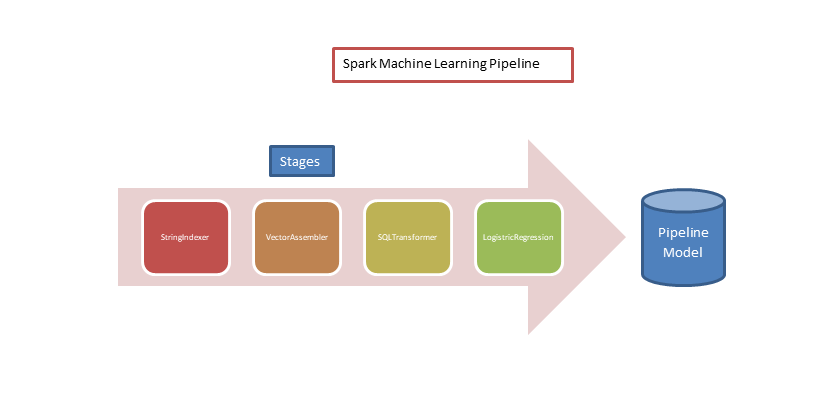
Transformers
The pipeline we define for this machine learning exercise will have the below transformers:
- StringIndexer: This transformation encodes a string column of labels to a column of label indices. In this dataset we want to encode the columns Embarked, Pclass and Sex with indices values. Let us consider the sex column which holds values “male” or “female”. In order to use this columns in the final logistic regression algorithm, we will encode this into indices like below:
| Id | Sex | SexIndex |
| 0 | male | 1.0 |
| 1 | female | 0.0 |
| 2 | female | 0.0 |
We will feed this indexed columns to the next stage of the pipeline.
- VectorAssembler: This transformation will combine the columns of indices into a single vector column. This vector column of features will be the input to the logic regression algorithm we will use eventually to build our model. Therefore, in our example, the result of the vector assembler will look like below:
| PIndex | SexIndex | Age | Fare | WithFamily | EmbarkIndex | features |
| 1.0 | 0.0 | 21 | 10 | 1.0 | 1.0 | [1.0, 0.0, 21.0, 10.0, 1.0,1.0] |
- SQLTransformer: This transformation implements the transformations that are defined using sql statements. We can use this transformer to also select specific feature columns . For instance, here we are going to use this to select only the label and feature columns of the transformed dataset
sql_transformer = SQLTransformer(statement="SELECT features, label FROM __THIS__")Classification
We have now to the final stage of the pipeline where we define the logistic regression algorithm to the transformed dataset.
- LogisticRegression: This model supports both binomial and multinomial classification. Here, we are interested in binomial classification only. I will not be going in depth of logistic regression algorithm here. However, I would encourage you to read on it to better understand. Here is a good overview. Leave me a note if you want me to a blog on it.
lr = LogisticRegression(maxIter=10, regParam=0.3, elasticNetParam=0.8)We will put the sequence of stages we defined into a pipeline instance and fit a model into the dataset. Putting it all together, the above should look like below:
Evaluation
We have fit and build a model. Now, we use this model this to predict the classification whether a passenger survives the titanic disaster. It is also important to evaluate how well the model performs with unseen test data. ThIn our exercise here, we will use BinaryClassificationEvaluator. This evaluator expects the predictions made by the model and the true labels. It would return by default the areaUnderROC value. This would help us evaluate whether the model needs further tuning or is the tuning has actually helped us to build a better model.
predictions = model.transform(testData)
evaluator = BinaryClassificationEvaluator(rawPredictionCol="rawPrediction")
evaluator.evaluate(predictions)
The evaluator returned back a value of 0.77. You can play around with the dataset and try out other engineered features and logistic regression parameter. Let me know the best score you get below 🙂
Spark ML provide a great suite of tools and methods to process your large scale data and build machine learning model. Pipeline is a neat way to systematically define your machine learning stages. In addition, you can choose to save the model you build and deploy into your application. If you found it useful, leave a comment. Thanks for reading.